Modding my espresso machine
Posted on , by Samuel Leeuwenburg
The KiCad project & firmware for this project can be found on github.
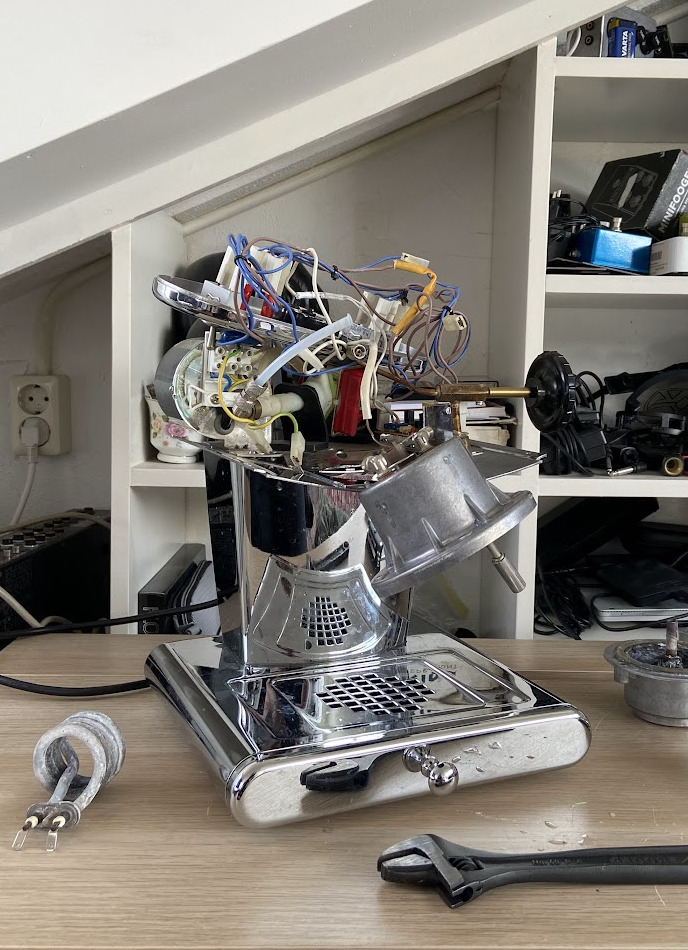
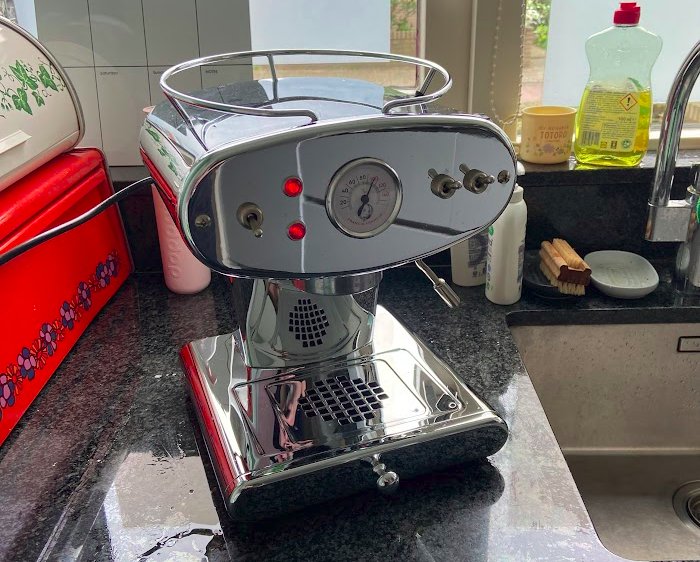
I recently acquired a secondhand espresso machine, it is an old FrancisFrancis! X1 and although it is absolutely beautiful it was in a horrible state. The previous owners told me they didn't really drink coffee at all and by looking at the expiry date on the pads that came with it I'll take their word for it.
Everything still worked, well kind of.. Technically everything worked. But the boiler did not retain heat very well, and using the steam pipe gave me about 1 second of steam before turning into a waterstream. So I removed the enclosure and opened up the boiler, it was almost completely filled with scale leaving only a small portion left for water. This explained the poor heat retention and lack of steam.
I cleaned most of it up and got a working machine, but I also managed to find a brass boiler replacement so I decided to swap it out entirely. Better heat retention, less scale buildup and most importantly the brass group head has a standard portafilter size, meaning I can get one of those hip naked portafilters.
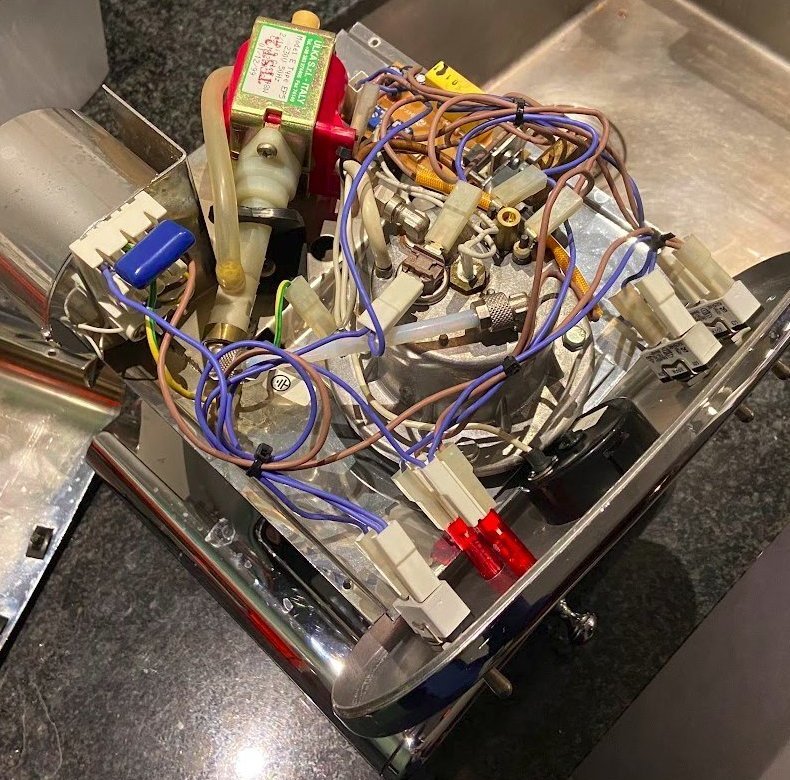
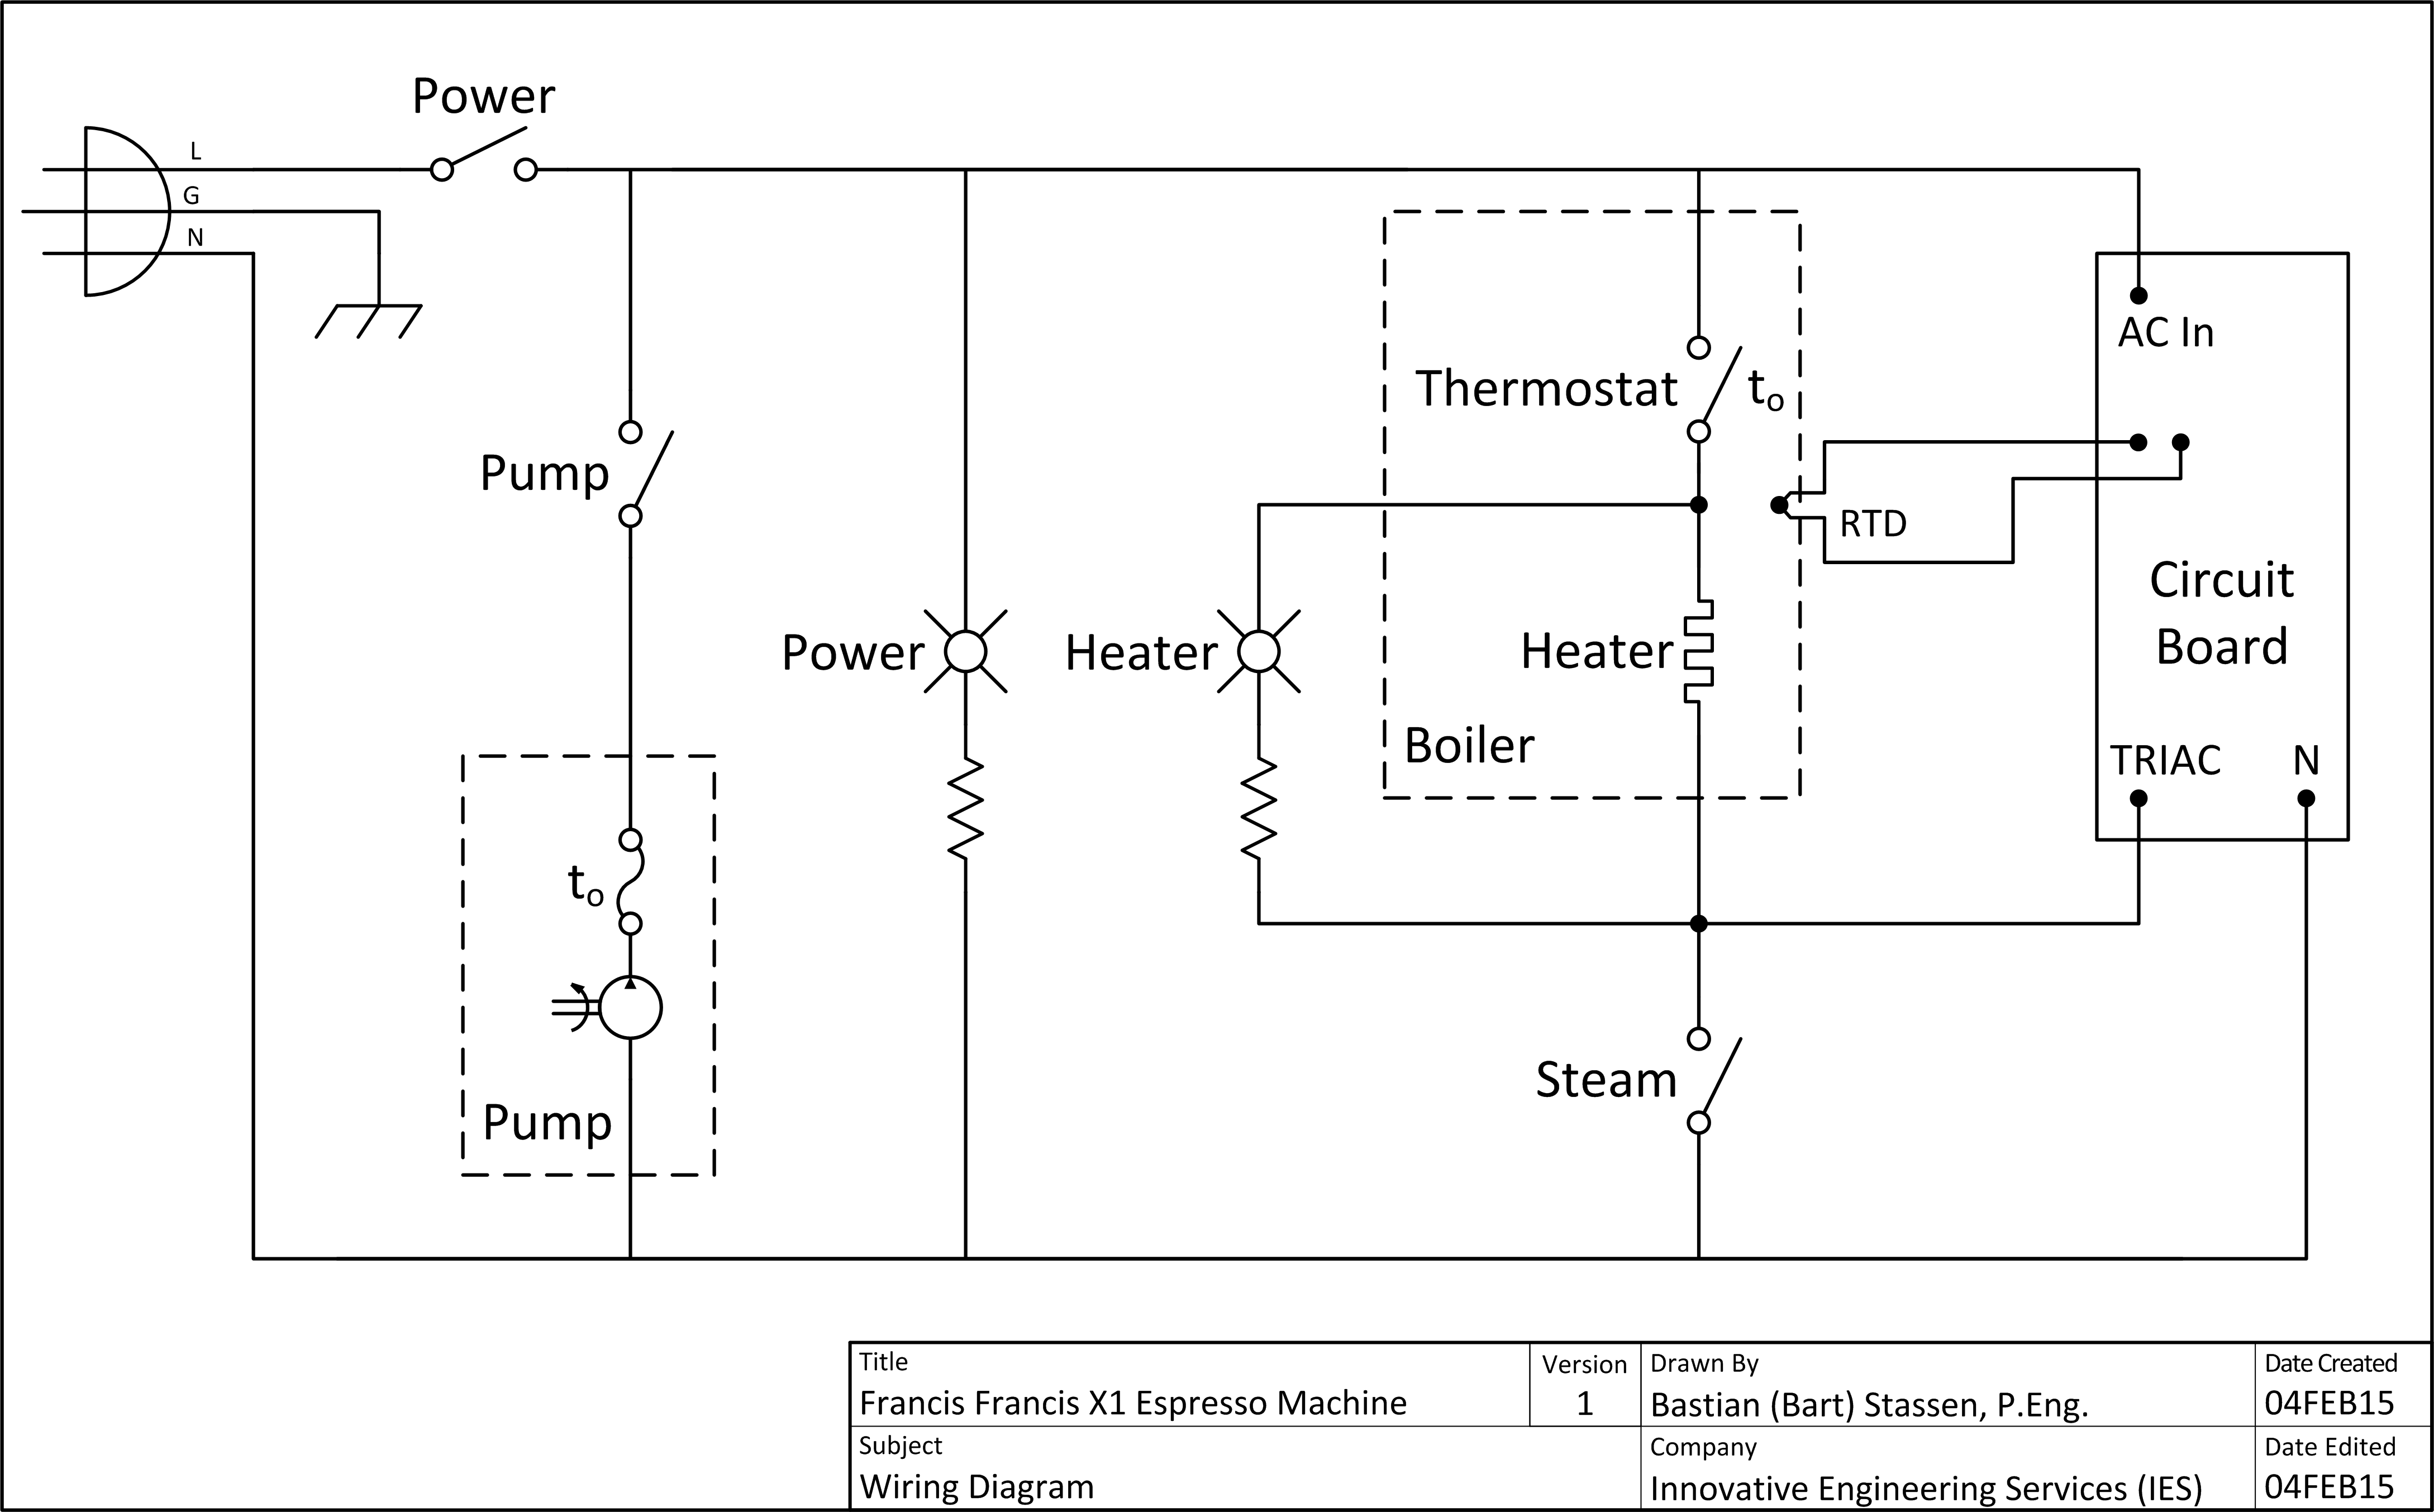
When I was replacing the boiler I noticed the machine itself is actually pretty simple, if you ignore the rats nest of cables of course. Somebody already did the hard work and put a schematic overview of the machine online. A perfect opportunity to mod the device.
How the machine works
 There is a small PCB which acts as the smarts of the device measuring the temperature of the boiler
and turning the heater on/off based on a set threshold temperature.
When the steam mode is switched on the PCB is bypassed and the temperature is determed by
a thermostat attached to the boiler which cuts off the power at a higher (steam) temperature.
There is a also a thermal fuse for safety,
in case everything fails and you have an uncontrolled system then the fuse burns and the whole thing shuts off.
There is a small PCB which acts as the smarts of the device measuring the temperature of the boiler
and turning the heater on/off based on a set threshold temperature.
When the steam mode is switched on the PCB is bypassed and the temperature is determed by
a thermostat attached to the boiler which cuts off the power at a higher (steam) temperature.
There is a also a thermal fuse for safety,
in case everything fails and you have an uncontrolled system then the fuse burns and the whole thing shuts off.
The primary reason I wanted to mod the machine is the poor temperature performance, it is about as basic as it gets. Is the temperature too low? Turn on, is it too high? Turn off. What ends up happening is that when you turn on the machine the temperature shoot way above the target to something like 130 degrees, and then you end up waiting 15 minutes for the thing to settle to some fixed value set by an internal potentiometer. Or if you are anything like me you just make a cup at 130 degrees anyway and get bummed out it doesn't taste the way you want it to.
Most components are worth keeping except for the PCB, I can actually solve everything by creating my own PCB that measures the temperature and can cutoff power to the heater element using a relay. This way I keep all safety features already built in and I can add my own PID control to get the desired temperature. As a bonus I removed the steam toggle bypass-the-pcb connection and instead catch the toggle switch position digitally, then I can easily control all the state digitally.
The final schematic:
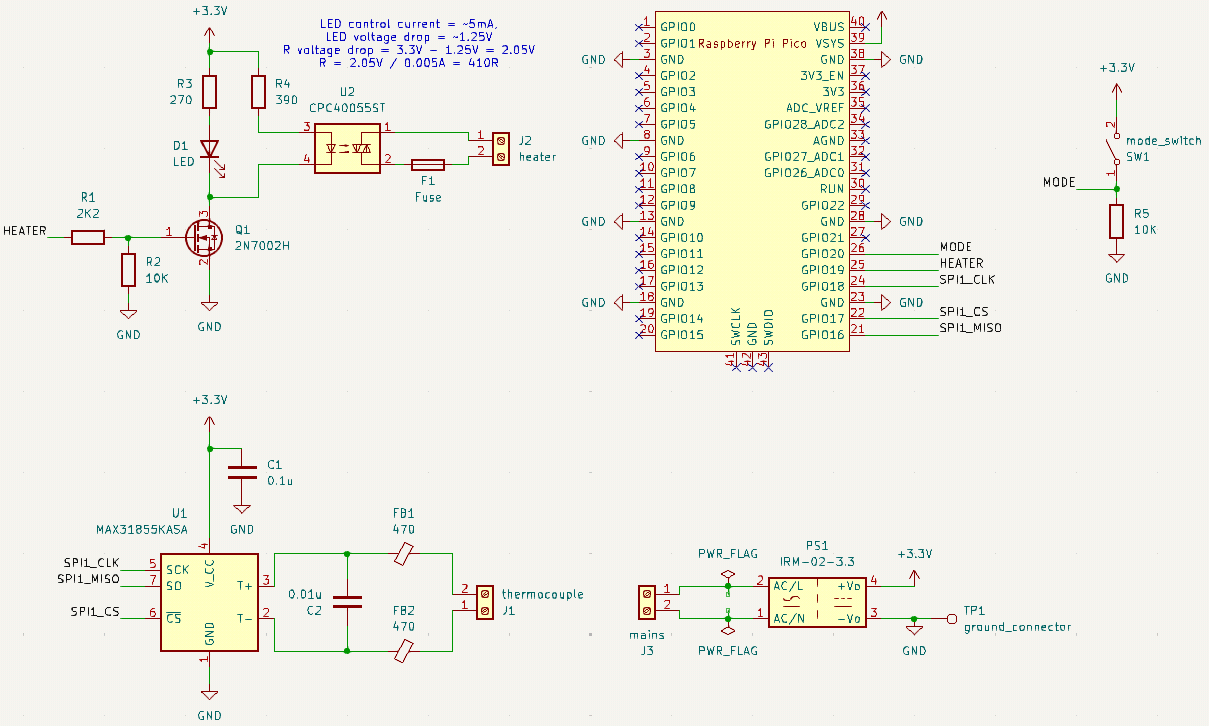 A MAX31855 to measure the temperature and a solid state relay so the machine doesn't get on anyone's nerves.
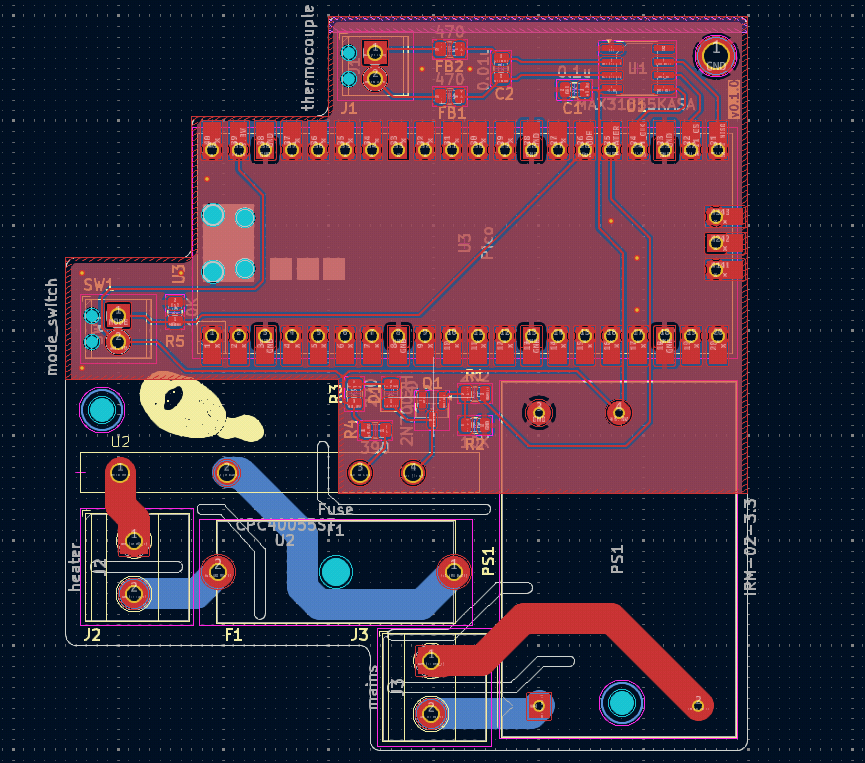 I seperated the AC and DC components on the board and added a cute little platypus drawing my wife made me.
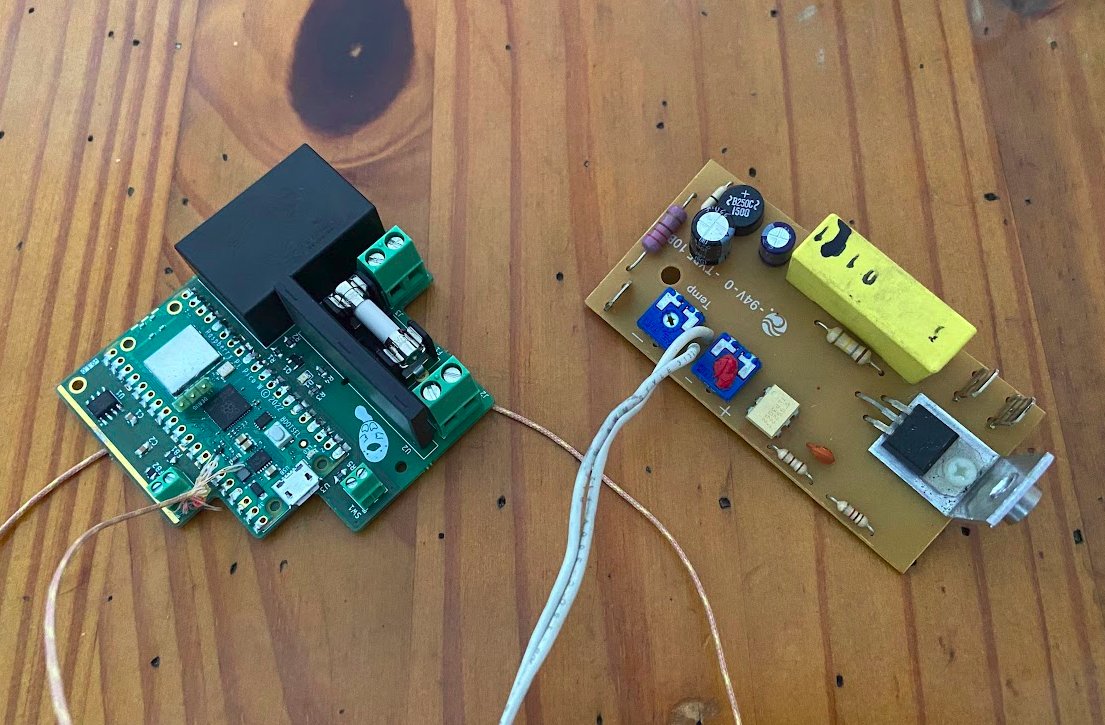
The final assembled PCB next to the old one, hello 21st century!
PID control
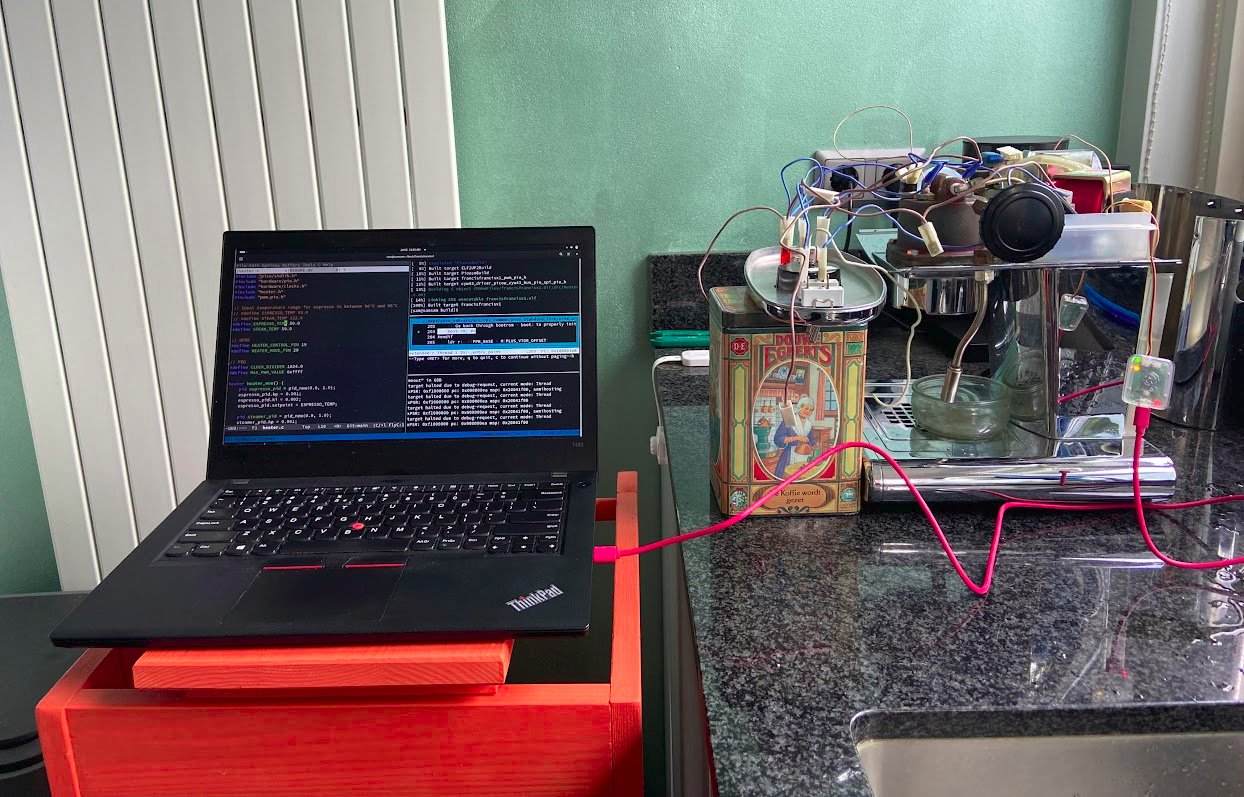 Now that I have full control over the heater it is time to tweak some values.
Since I'm using the Raspberry Pico W it is trivial to make the metrics available through an HTTP call,
I then used an Elixir Livebook to graph the values in realtime.
Now that I have full control over the heater it is time to tweak some values.
Since I'm using the Raspberry Pico W it is trivial to make the metrics available through an HTTP call,
I then used an Elixir Livebook to graph the values in realtime.
Setting some initial guesstimated PID values shows promise, but it is far from where I want to be.
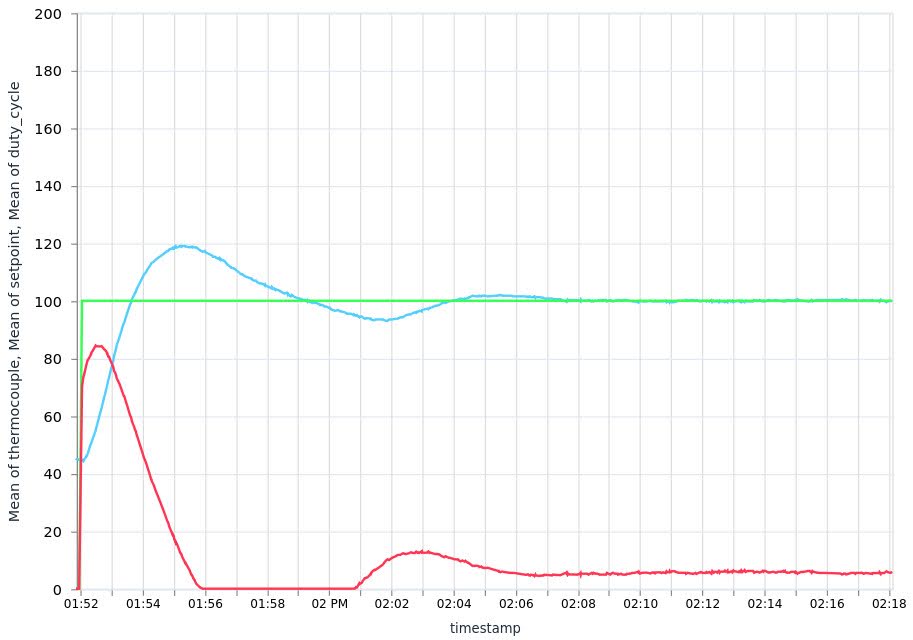 Green is the target temperature, blue the measured temperature and red is the duty cycle for the heater.
As you can see the system is too slow to anticipate where it is going, making it overshoot like crazy. After drinking lots of coffee and flushing the machine like crazy (to cool the boiler off faster) I ended up with the following performance:
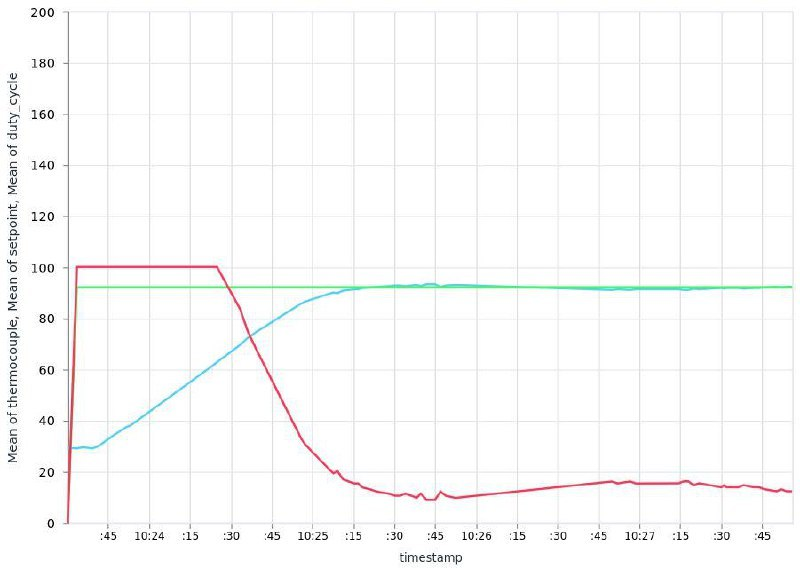 The heater starts off at maximum duty cycle (fully on)
and then backs off just quick enough to flatten the curve of the temperature exactly at the desired height.
The temperature is reached within two minutes!
Way better than anything I thought I would achieve.
The heater starts off at maximum duty cycle (fully on)
and then backs off just quick enough to flatten the curve of the temperature exactly at the desired height.
The temperature is reached within two minutes!
Way better than anything I thought I would achieve.
PID controls are very flexible and (for good reason) used extensively, but they are hardly intuitive. In my experience tweaking a PID is equal parts fun and frustration, the system gets very unpredictable very fast. But the end result is very rewarding, you get to see a system adapt to realtime changes without any logic involved. A great video that helped me with my intuition was this one.
Finalizing, if only just to be able to drink coffee again
Hacking hardware is fun, the biggest challenge is knowing when to quit. Maybe because the project involved my daily coffee routine it was easier to be pragmatic and know where I want to cut corners. Maybe a lack of coffee if the machine would be broken was a good motivator? Who can tell, it works and it has been running for weeks now. I put SWD pins in the back so I can update the firmware without opening up the machine but I haven't used them yet.
The HTTP API is also still running on the firmware but the enclosure acts as a faraday cage blocking all signals. I'm not really bothered, my intention was never to make it "smart" like an IoT device. To me, the charm in these machines is operating them yourself.